Nest Doorbell Quick Look: Welcome to your smart home
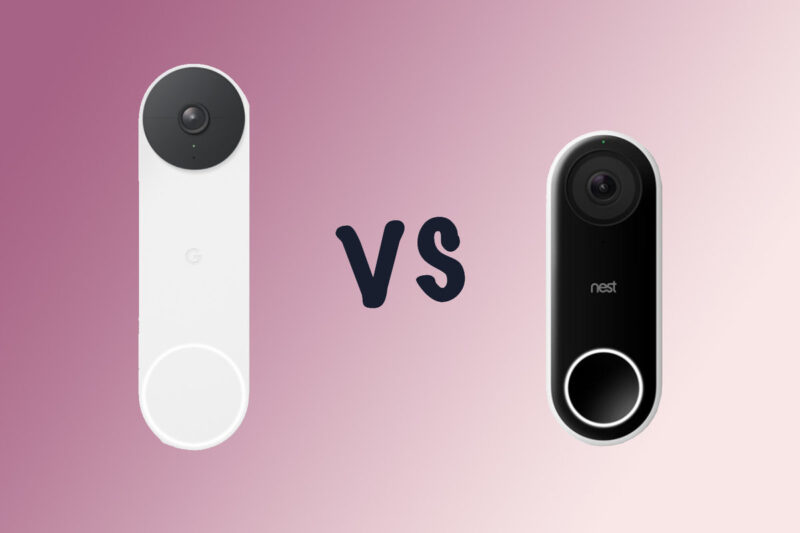
The new Nest Doorbell (battery) from Google is the successor to the excellent Nest Hello (wired). But the Nest Hello is expensive and only works with existing doorbell wiring. This new doorbell from Google fills both those gaps since it’s 500 SEK ($50 USD) cheaper and working off battery power (huray!).
Whats in the box
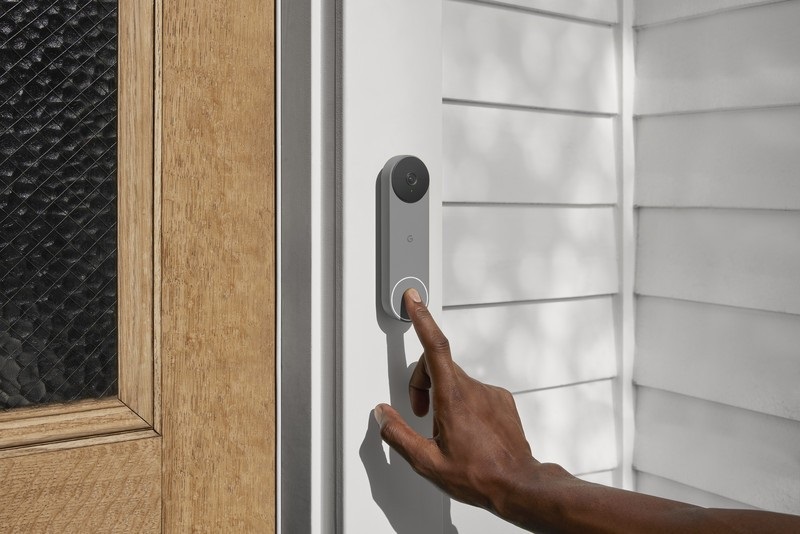
The Google Nest Doorbell (Battery)’s elegant and modern design shouldn’t look too out of place alongside most front doors. As usual with products of this type, the Nest Doorbell comes with a selection of bits and bobs to help you mount the doorbell to your door frame and connect it up to any existing mains and chime wiring you might have.
There’s no power supply provided in the box but, since the Nest Doorbell has an integrated 6,000mAh battery, that’s not too much of a problem. There’s also no chime unit supplied, which means you’ll have to connect the doorbell physically to an existing doorbell chime. However, some of the convenience of a battery disappears if you still need to physically connect it with existing cables in your home. Luckily you can also use a Nest speaker to notify when someone is at the door, which is fine, but I’d love to see Google send a small wireless chime in the package (even if they had to bump the price up to that of its precursor).
Looks and features
The doorbell itself is quite a big piece (huge compared to the Hello), but this is of course needed for the battery. The button is still at the bottom and has an LED ring around it which lights up when a person is detected, so it’s obvious where visitors have to press. And they’ll hear a doorbell chime sound when they press it, along with a pre-recorded response (if you’ve choose to use one).
The big change, aside from the battery, is that there’s a more powerful onboard processor which can do things like recognise vehicles, animals and packages. This means you can get alerts for those, as well as set up multiple zones, without having to subscribe to Nest Aware to get those features.
You can also enable Quiet time, which is the amount of time you want to mute visitor announcements on Google Assistant-enabled devices and an indoor chime if you have one.
Installation
To install the Nest Doorbell you jump into the Google Home app and then it’s as simple as hitting the ‘+’ button in the top left corner of the app. You do the setup as part of the hardware installation, so basically charge the doorbell up and then just follow the instructions.
Google makes it as easy as possible to install the Nest Doorbell. The app asks you to scan the QR code on the rear of the device, which gives the app all the info it needs to find it and then configure it on your network.
Nest Aware
As with its precursor, some features rely on a Nest Aware subscription. If you want access to recordings beyond the 3-hour event window (included with the device) you need to get a payment plan of your liking. Nest Aware comes with two options above and beyond the standard featureset offeirng 30-Day storage for 55 SEK/month ($8.99) or 550 SEK ($89.99) per year with Nest Aware, or you can jump up to 110 SEK/month ($18) or 1100 SEK ($180) per year for Nest Aware Plus which includes 60-days Event Video History with 10 days of 24/7 video history. Cloud storage costs money so I understand that Google charges for these features.
Verdict
It will take some time of testing before I can really recommend the Nest Doorbell to anyone, but as a way into the ecosystem, the Nest Doorbell seems to be a great place to start adding video security to your home. It’s an affordable and cool technology that will impress your friends (and any delivery guys/women).
PROS
- Affordable
- Nice features even without a subscription plan
CONS
- No chime included